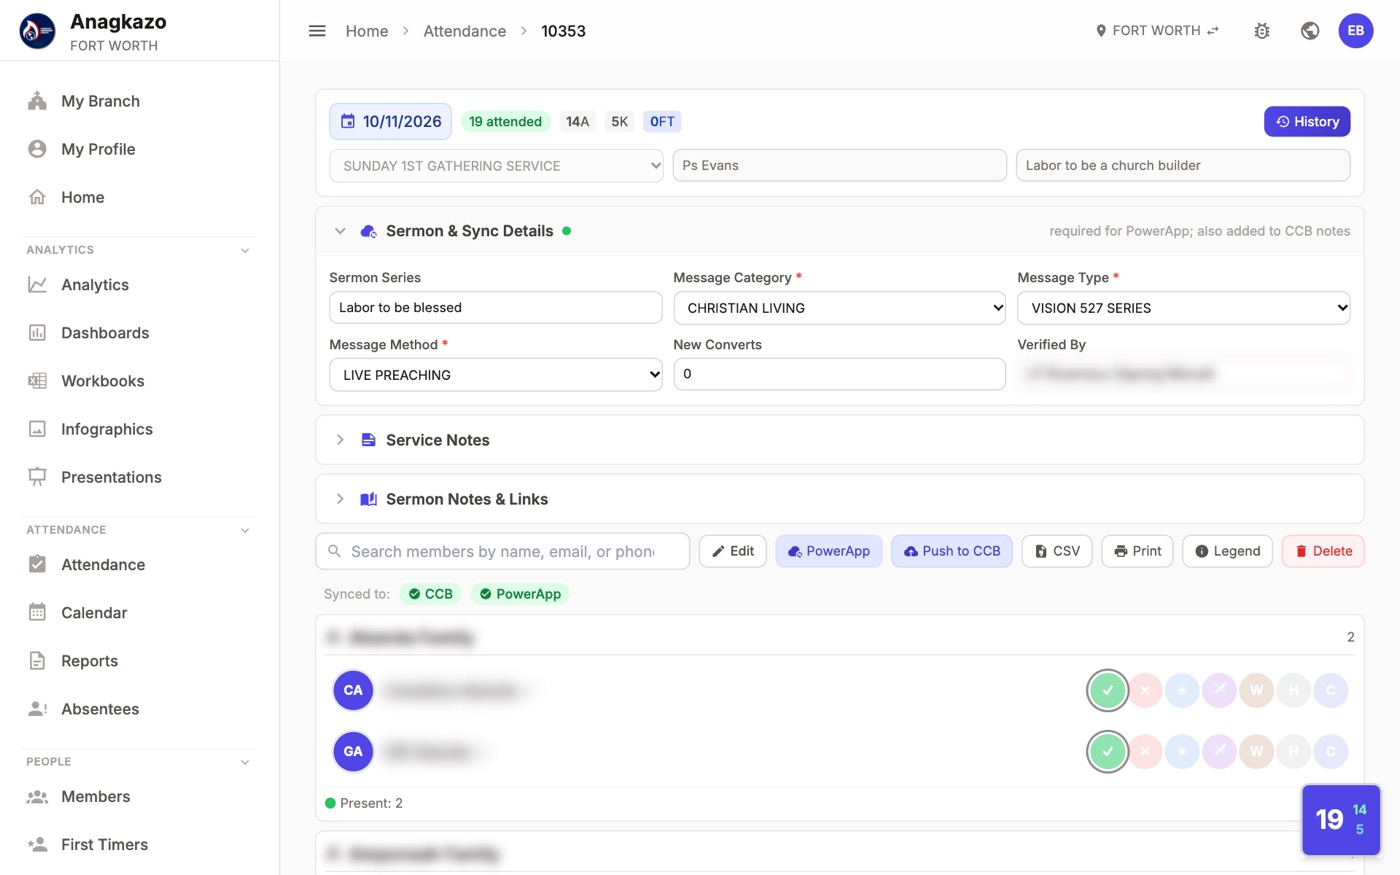
Sign in and look around
- Open app.anagkazo.app.
- Leave the workspace on Branch, search for your branch, and pick it.
- Click the Google button and use the same Google account you used to request access.
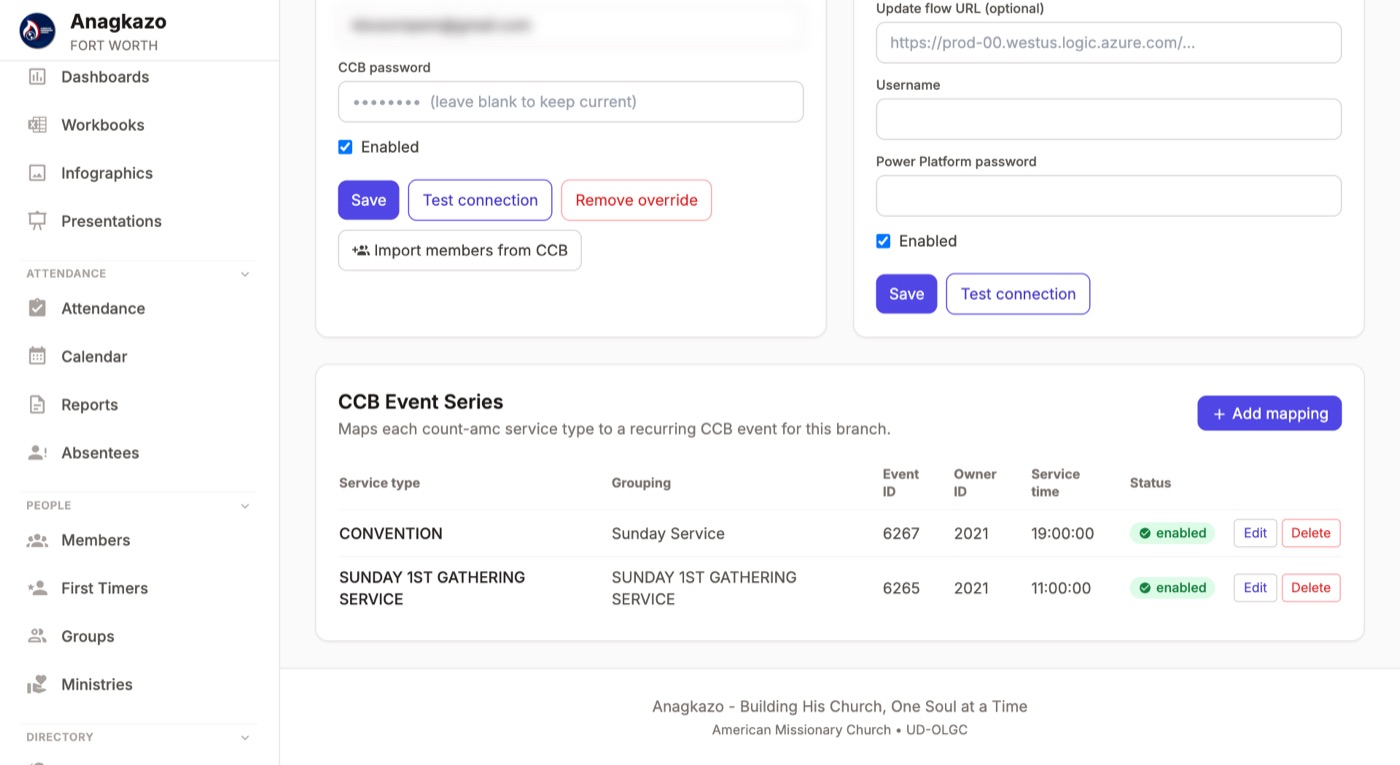
You land on your profile. Open My Branch in the top left for the overview: active members, average attendance, last Sunday and first timers. They read zero until you take your first attendance.
Not approved yet? The access request page shows where your request stands.
Add your ministries and groups
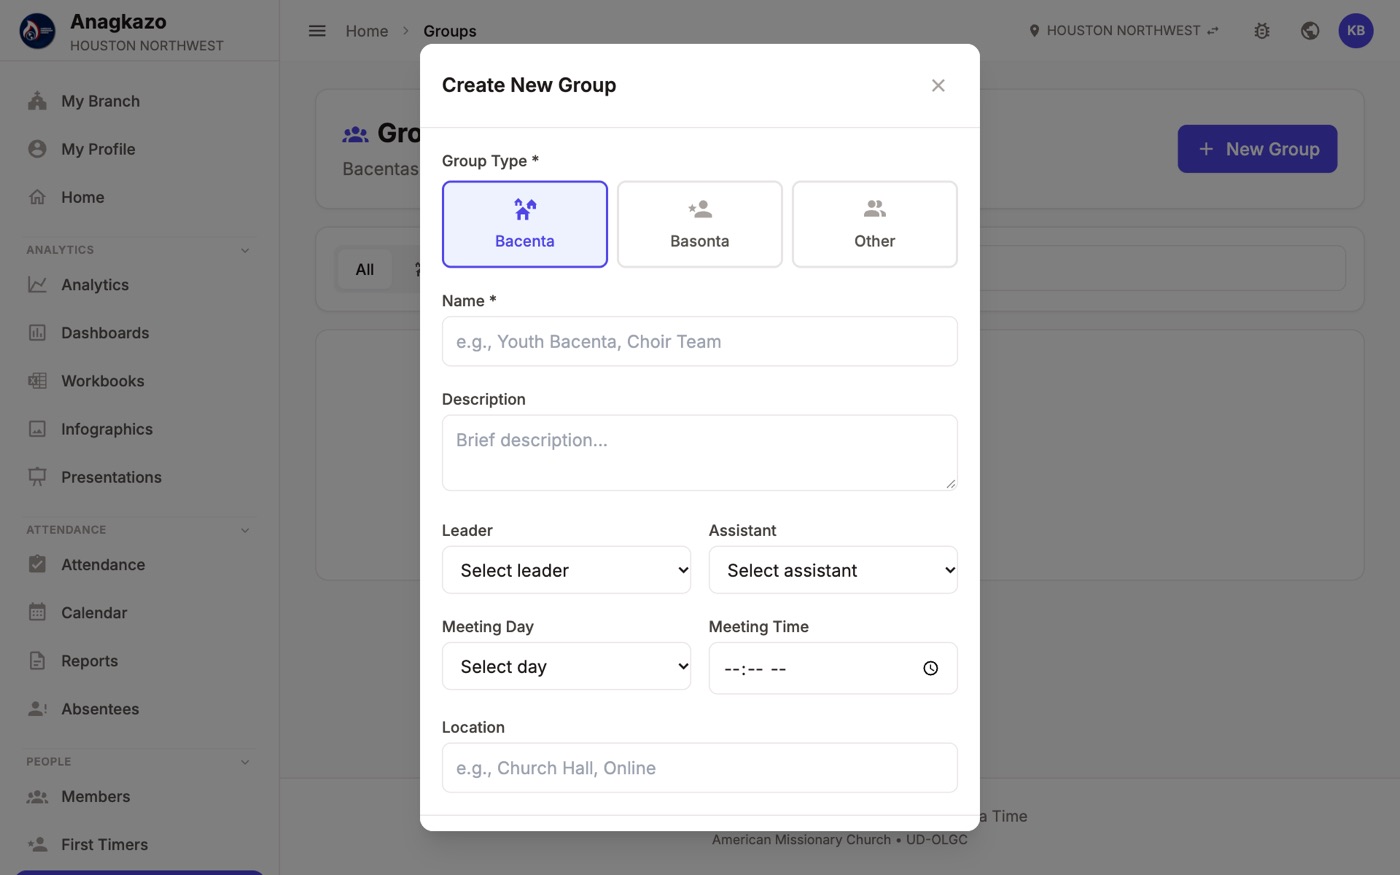
Open People › Groups and click New Group. Each group has one of three kinds:
- Bacenta: a small fellowship that meets in a home or area.
- Basonta: a ministry team, such as Choir, Ushers, Media or Children Ministry. You pick which team it is from a list.
- Other: anything else.
Give it a name, then choose a leader, an assistant, the meeting day and time, and a location.
Once your ministry teams exist, People › Ministries gives you a public join link and QR code. Members use it to volunteer for a team, and you approve them there.
Bring in your members
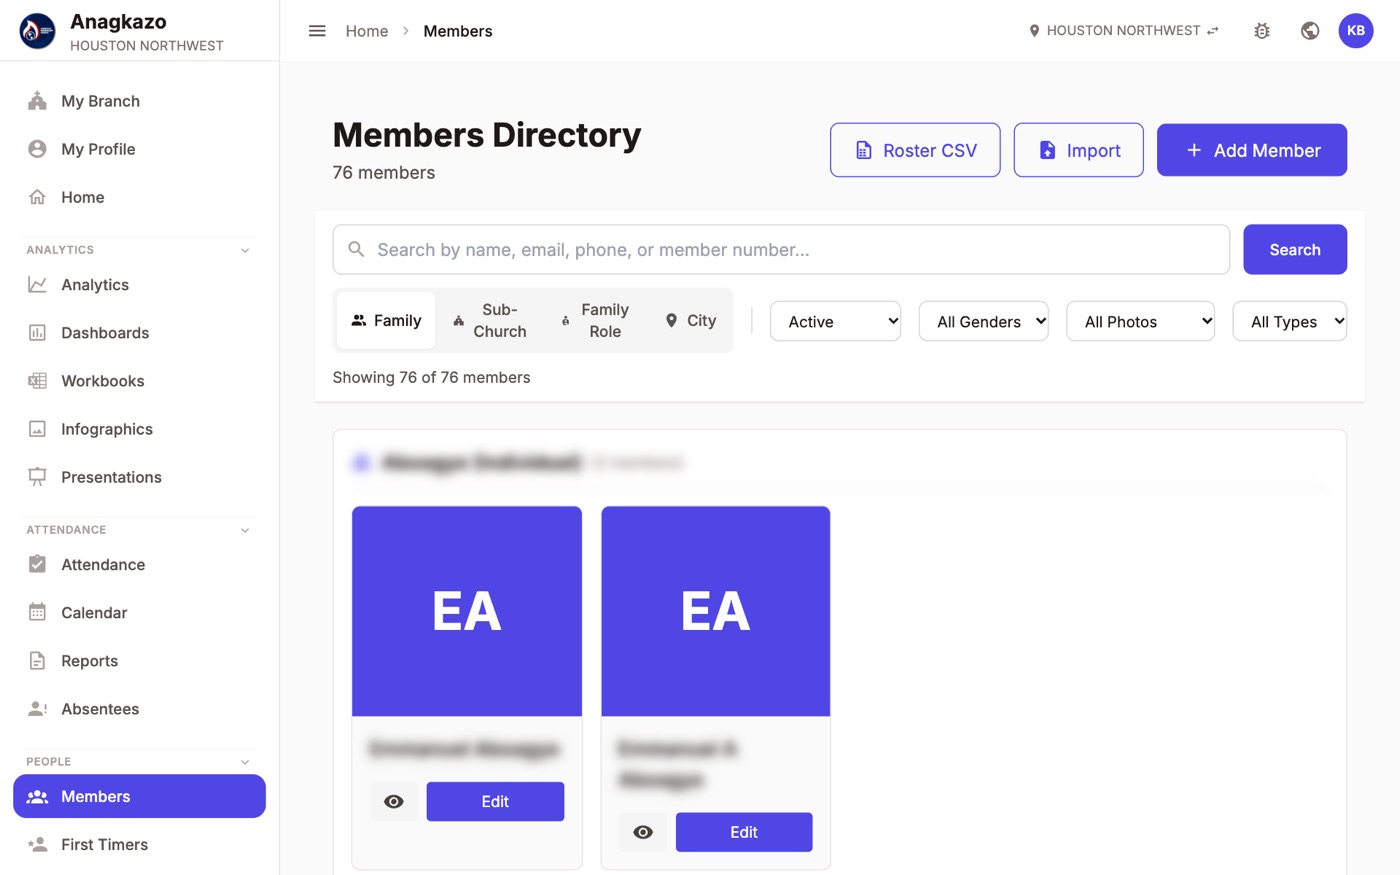
Open People › Members. There are four ways in. Use whichever fits.
| Add Member | Type one person in. Best for a handful. |
| Import | Download the CSV template, fill it in a spreadsheet, and upload it. You see a preview before anything is saved. |
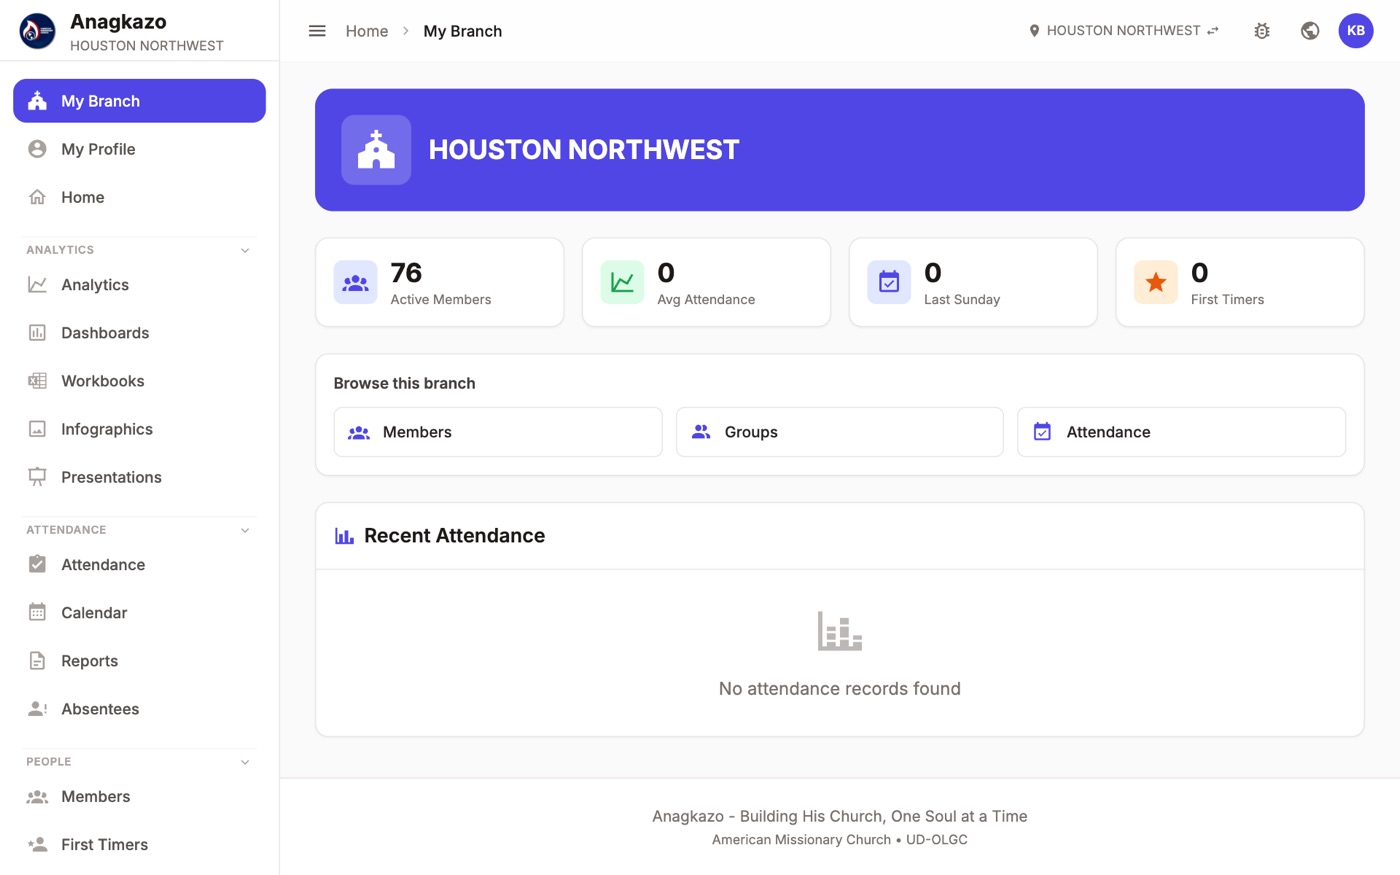
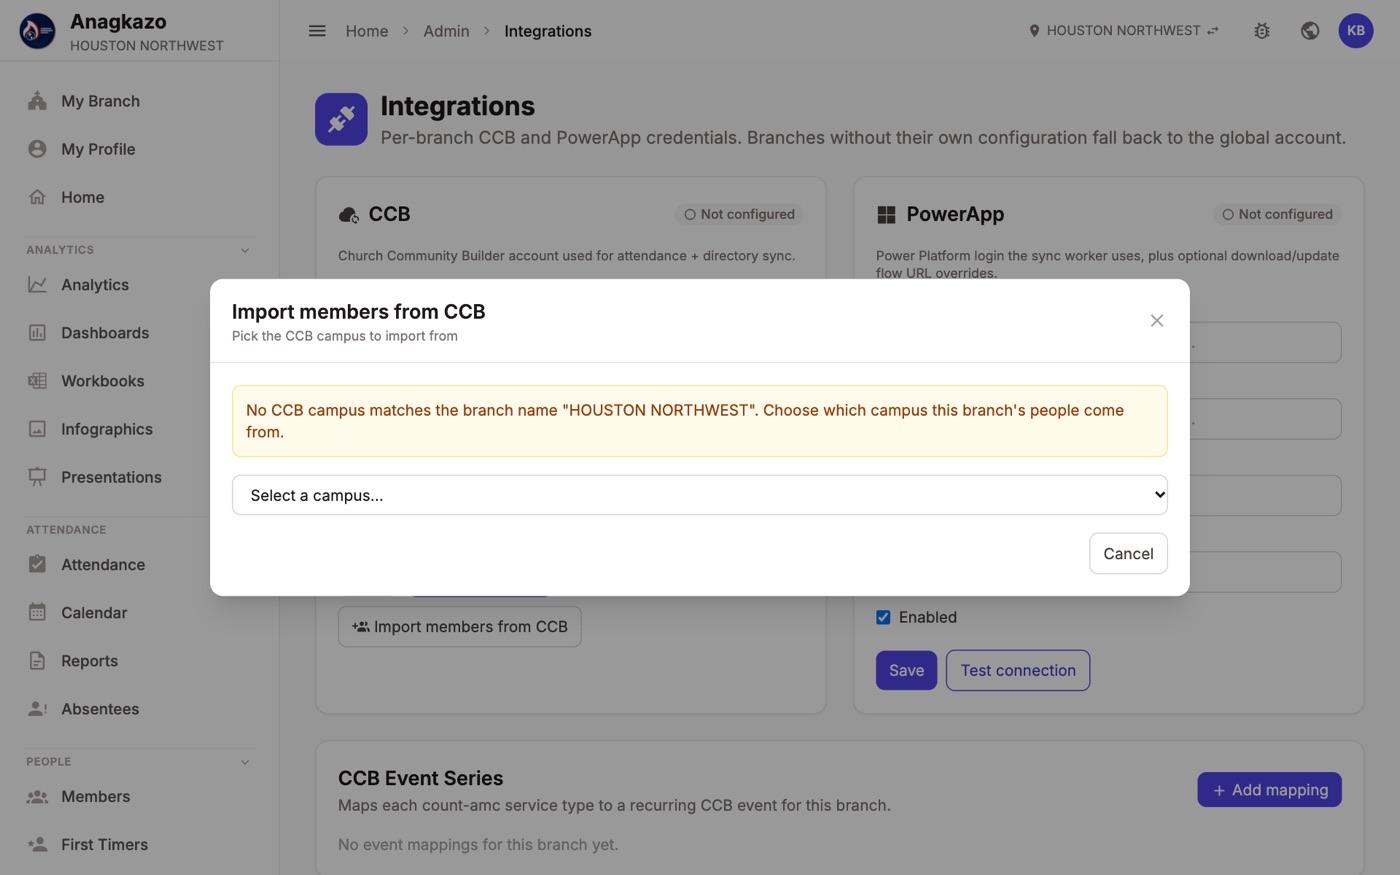
| From CCB | If your branch already uses CCB (Church Community Builder, the church database many of our branches use), go to Settings › Integrations and click Import members from CCB. Pick your campus and the people come in already linked to CCB. |
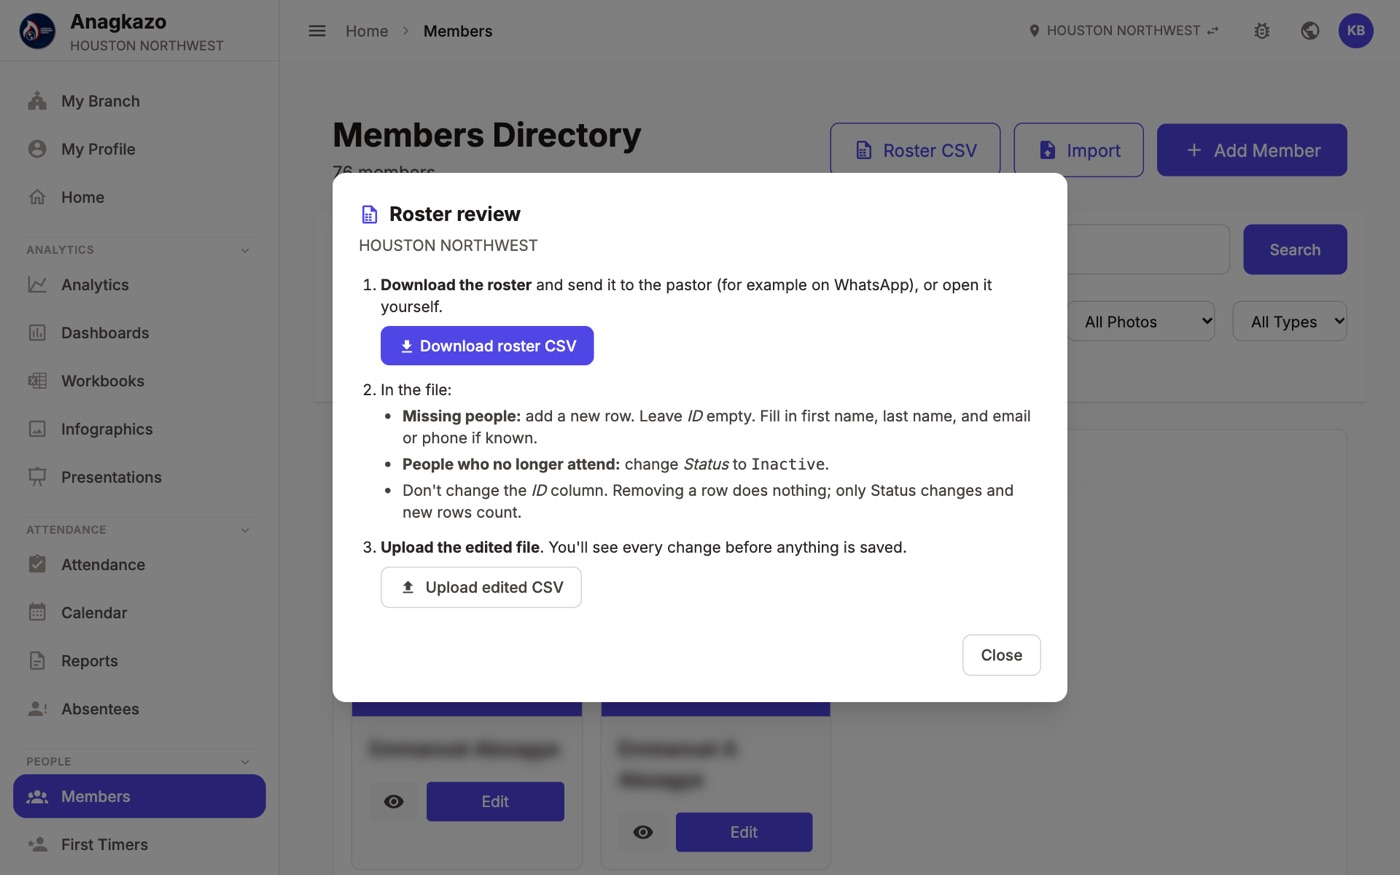
| Roster CSV | Once people are in, download the roster, add anyone missing, and mark people who stopped coming as Inactive. Upload it and review every change before it saves. |
Give people in one household the same Family name on their member record. They then show together, which makes attendance faster.
Give your helpers access
Anyone who signs in must first be a member of your branch with their email on file. They sign in with the Google account for that email.
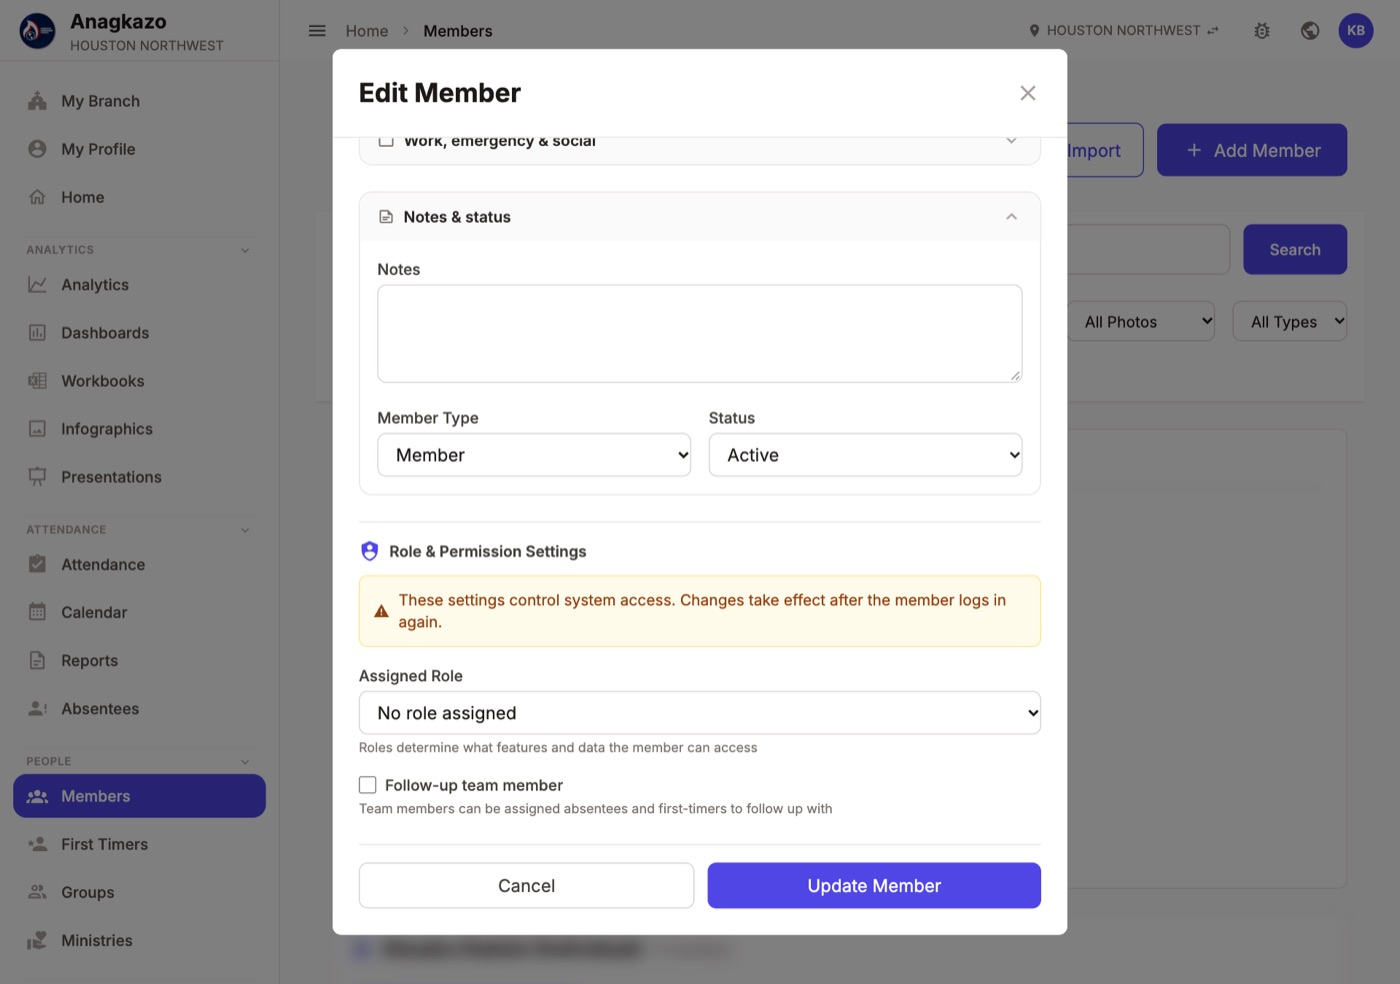
- Open People › Members and click Edit on the person.
- Scroll to Role & Permission Settings and choose a role.
- Click Update Member. The change takes effect the next time they sign in.
| Church Administrator | Everything for your branch: members, attendance, groups, reports and sync. Give this to your branch admin and one backup. |
| Membership Manager | Adds and edits members and first timers. |
| Follow-up Team | Works the follow-up list: absentees and first timers to call or visit. |
| Group Leader | Sees members and runs their own group. |
| Member | Their own profile only. |
Tick Follow-up team member to let someone receive absentees and first timers to call.
Take attendance
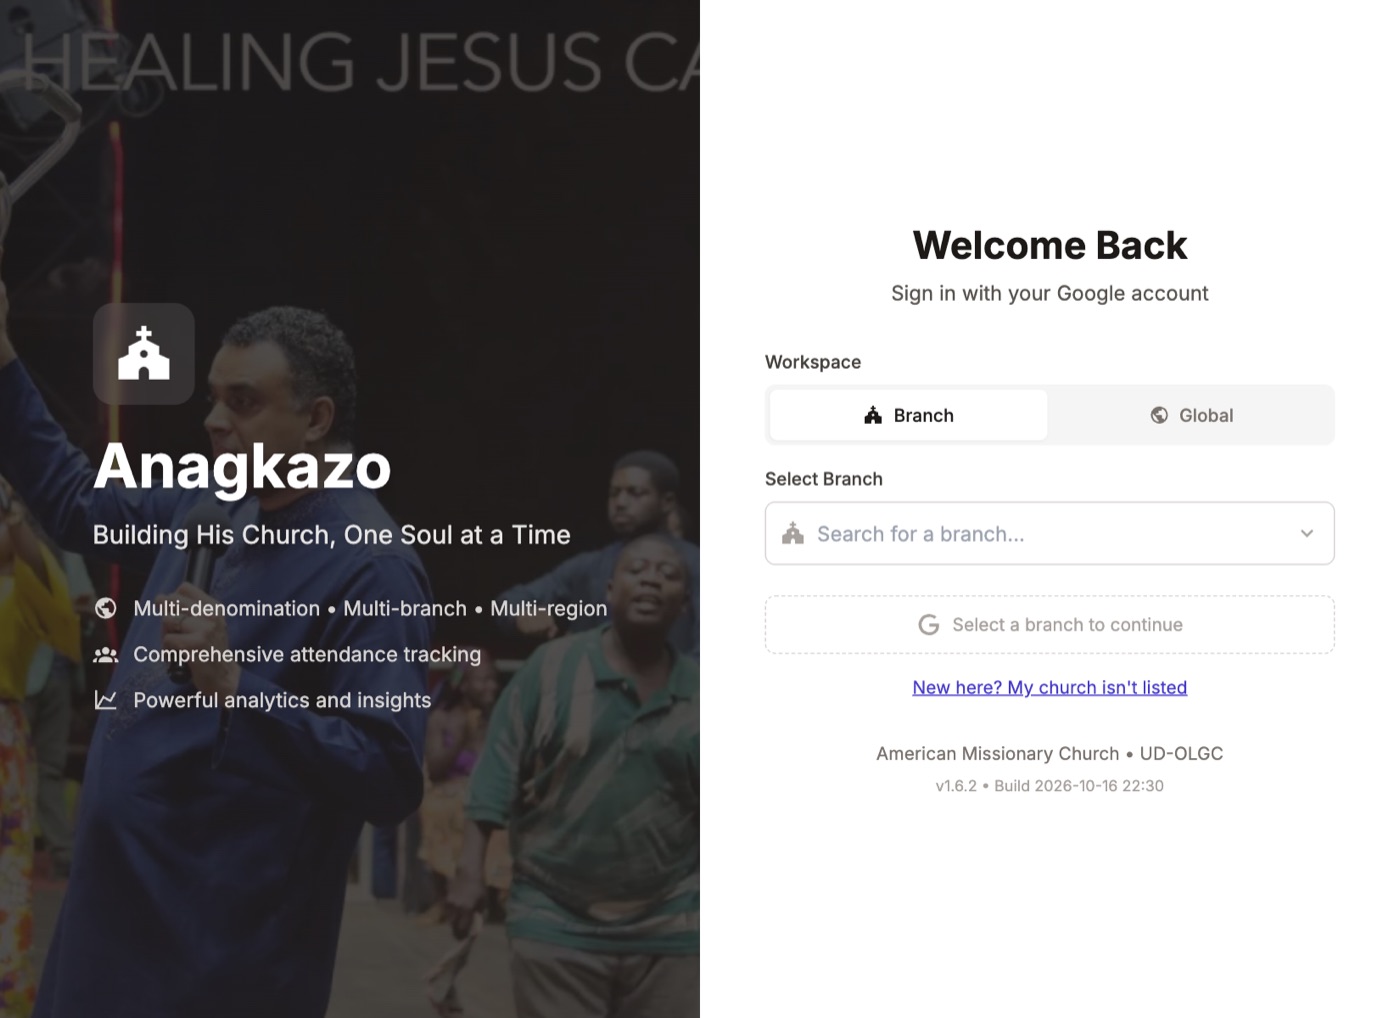
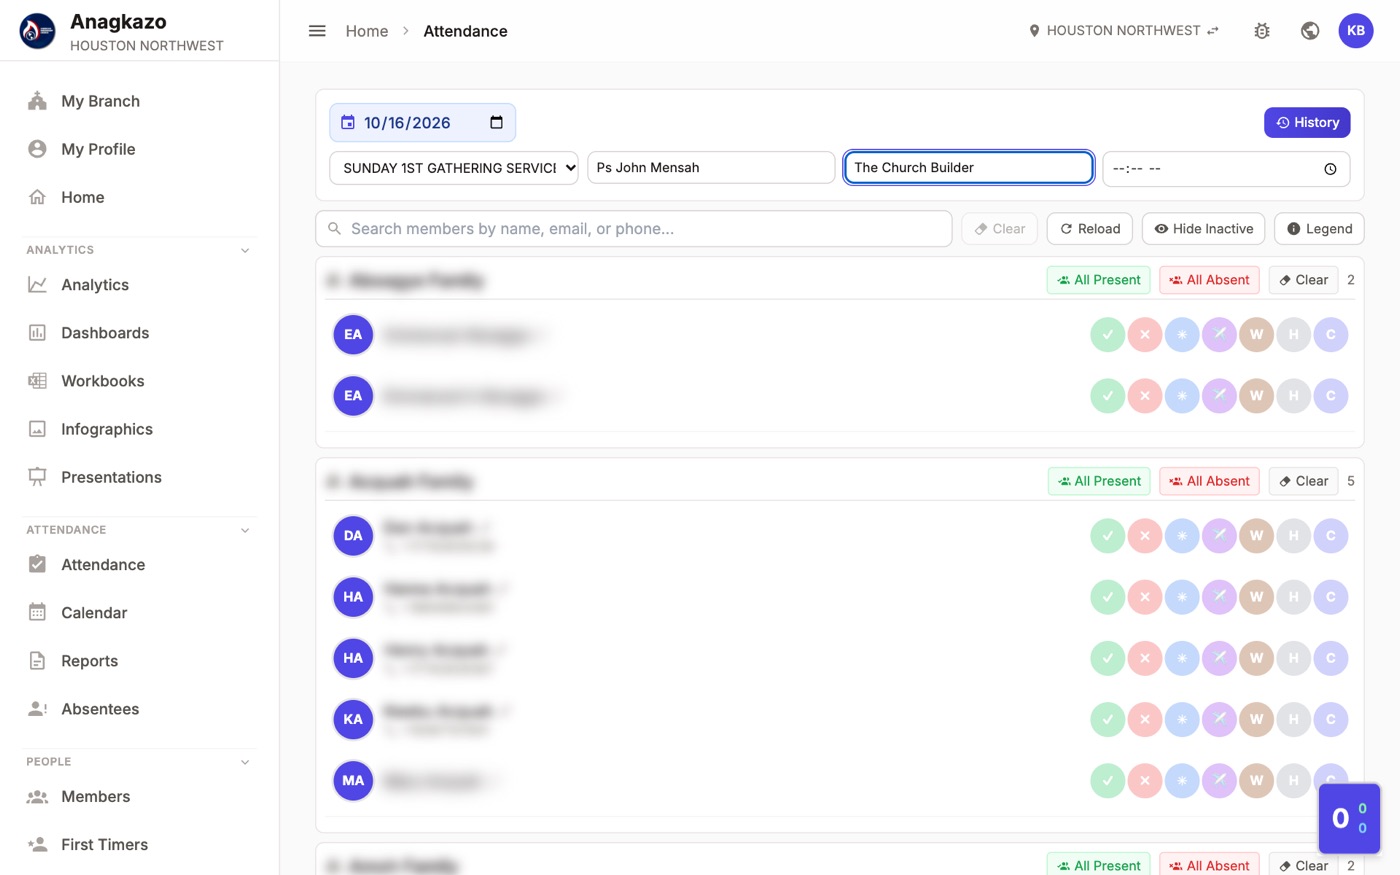
- Open Attendance › Attendance and click New attendance.
- Check the date and choose the service. Sunday is Sunday 1st Gathering Service. Midweek is Midweek Service.
- Fill in the Preacher and Sermon Title. Marking unlocks once both are filled.
- Tap one button per person, or use All Present on a family. Each tap saves right away. There is no save button.
The box in the bottom corner keeps the running total, split into adults and children.
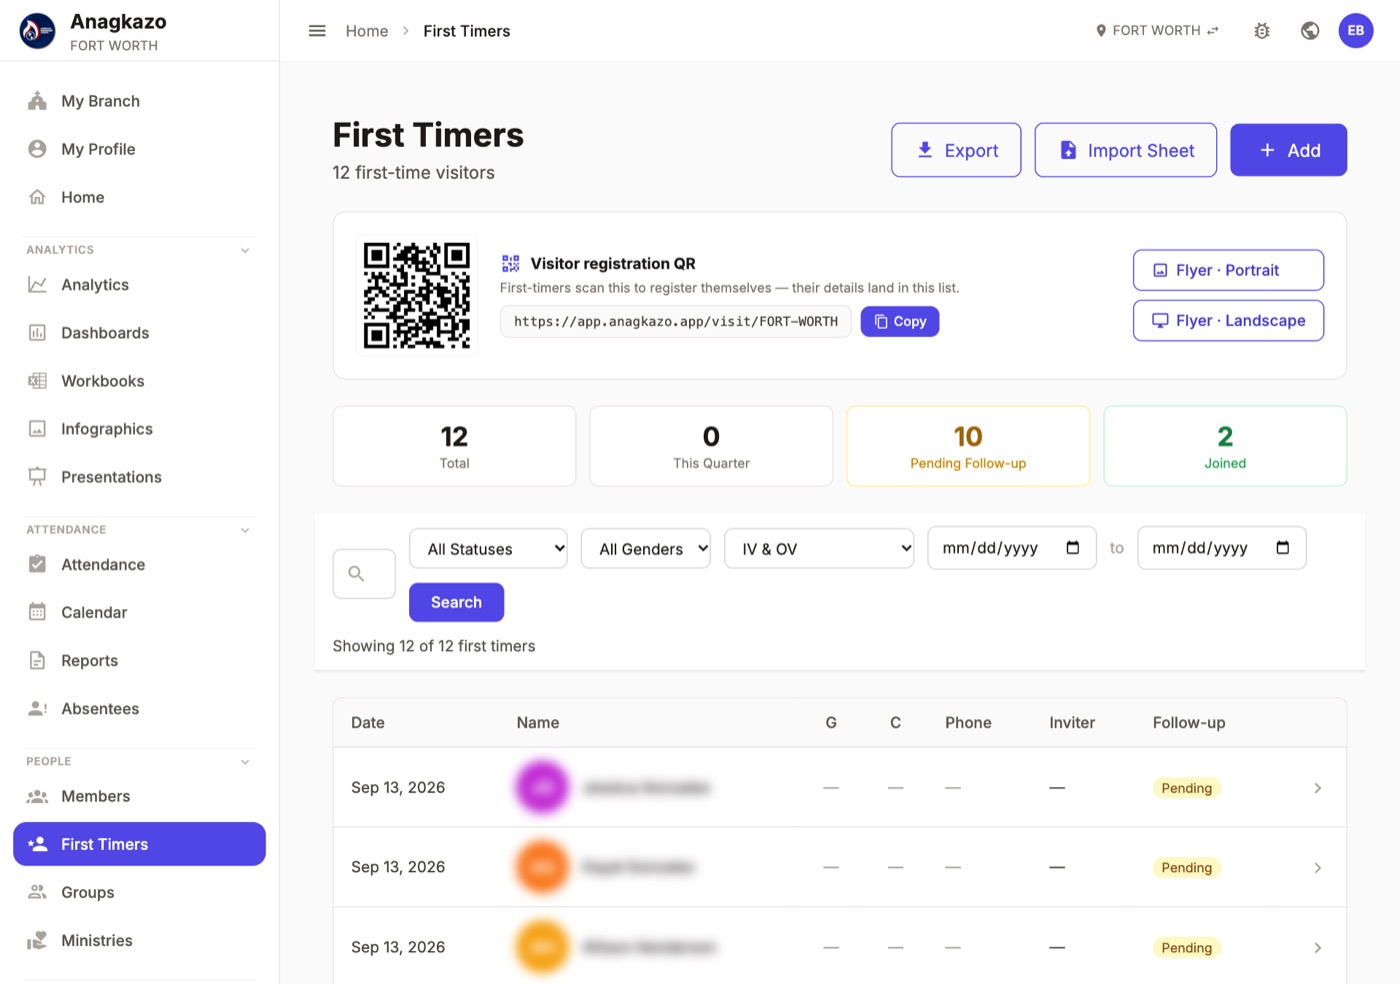
For visitors, open People › First Timers. Print the visitor QR code or a flyer. Visitors scan it and fill in their own details, and they appear in your First Timers list.
Sync with CCB and the global report
Your attendance can go to two other places. Neither happens on its own: you send each service with one button after you finish marking.
The global report is the denomination's attendance database, the PowerApp every branch reports to. It feeds the head office's weekly dashboards.
- Open the service from Attendance.
- Open Sermon & Sync Details and choose the Message Category, Message Type and Message Method.
- Click PowerApp. A green PowerApp badge under the buttons shows it went through. Fixing a service later? Click it again and the report is updated, not duplicated.
CCB is only for branches that keep their people in Church Community Builder. Click Push to CCB on the same page. It adds the people marked present to that service in CCB and never removes anyone CCB already has.